
The inspiration for this DIY came from Michaels.com. I saw this fun craft and decided to try it myself, but I couldn't find any full tutorials, so I decided to make one.
I volunteer with Big Brother and Big Sisters, so I am always looking for fun crafts to do with my "little sister". We love taking pictures, and try and decorate a couple frames a year so we can preserve our memories together. I think this craft will be perfect to do with her this year!
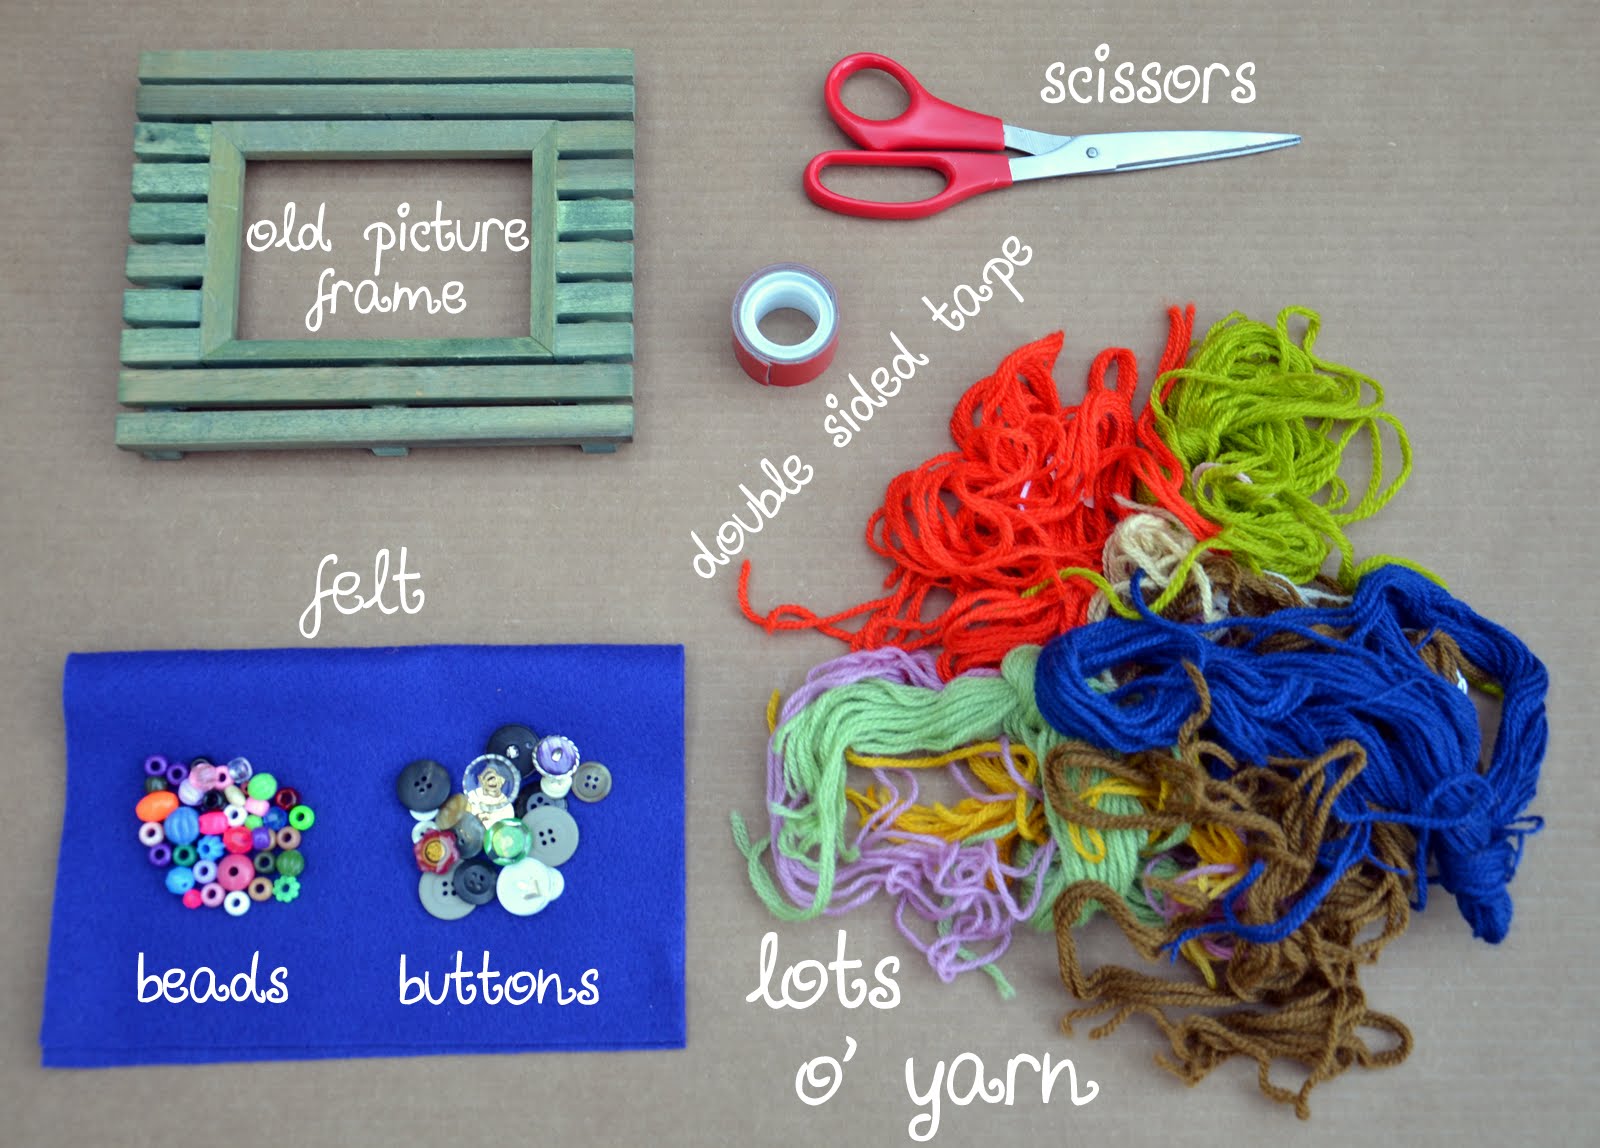
Materials: old picture frame/scissors/double sided tape/felt/beads/buttons/yarn/picture
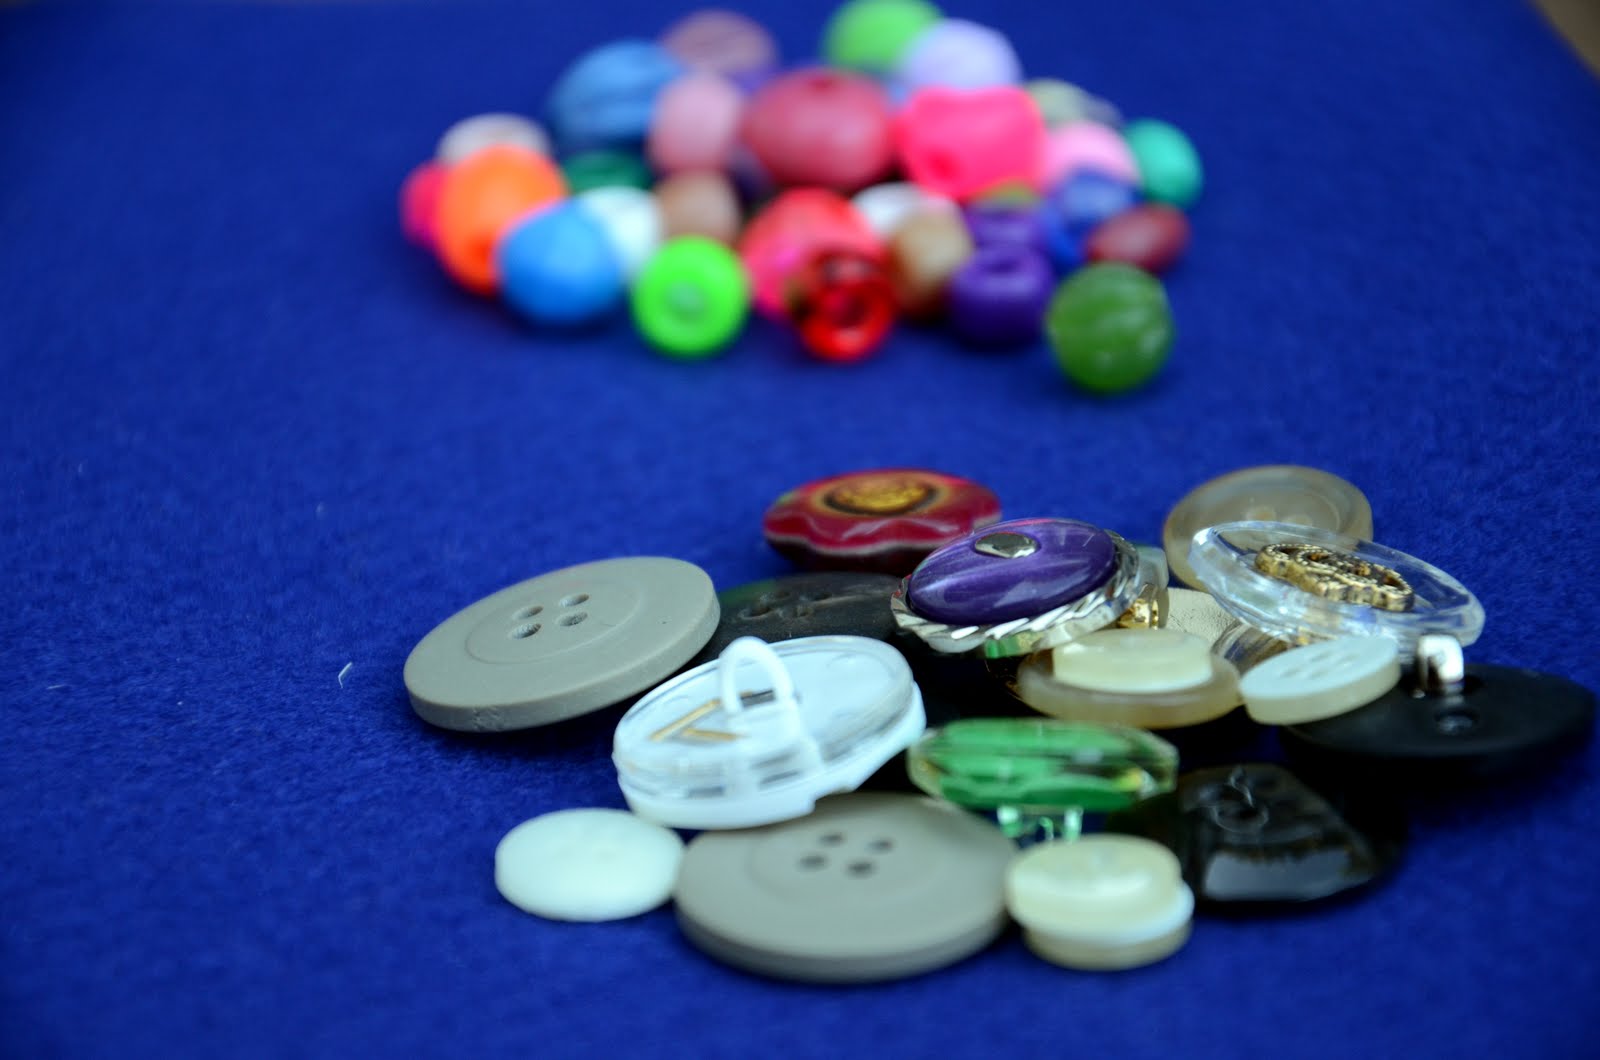
I started out with lots of buttons and beads, though I only ended up using the buttons. I liked the way they looked better, and I only had really bright coloured pony beads etc. I thought the buttons were just a little bit cuter.
The process is fairly straightforward.
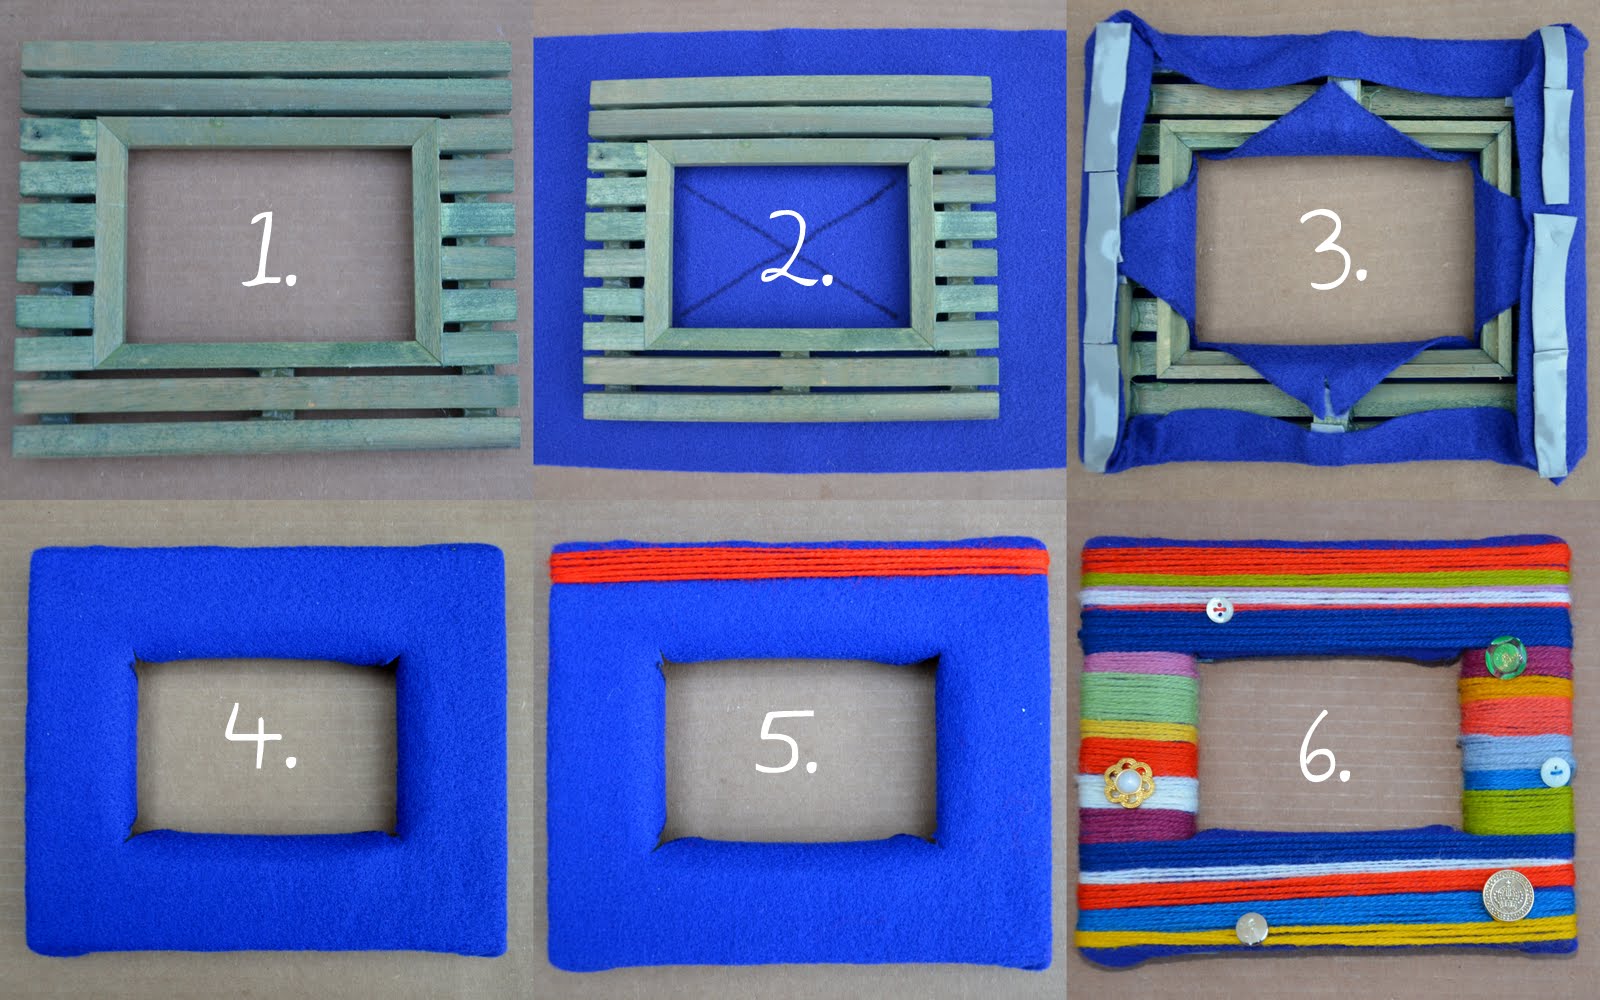
1. Take out the glass and back of your picture frame.
2. Measure and cut a piece of felt so that it will go all the way around your frame. Draw an X where the middle of the frame will be.
3. Cut on the lines of the X, and fold felt back. Place double sided tape on the back of the frame, so when you wrap the felt around, it will stick.
4. After the X is finished, wrap the rest of the felt around. I had to trim a bit around the corners, it got a bit bulky.
5. Place more strips of double sided tape on the back of the frame, on the felt. Starting at the back, secure the end of a piece of yarn onto the tape, wrap around as many times as you would like, and then secure again on the tape.
6. String buttons and beads onto the yarn as well.
7. When finished wrapping the yarn around the frame, place tape (I used duct tape) over the back of the frame to keep all the yarn ends from coming off.
You can get creative with your yarn and accessories, I decided to keep it simple and just wrap the yarn around without doing anything fancy. But feel free to add other materials such as jute, or string. Braiding or twisting the yarn would also add texture to your frame.
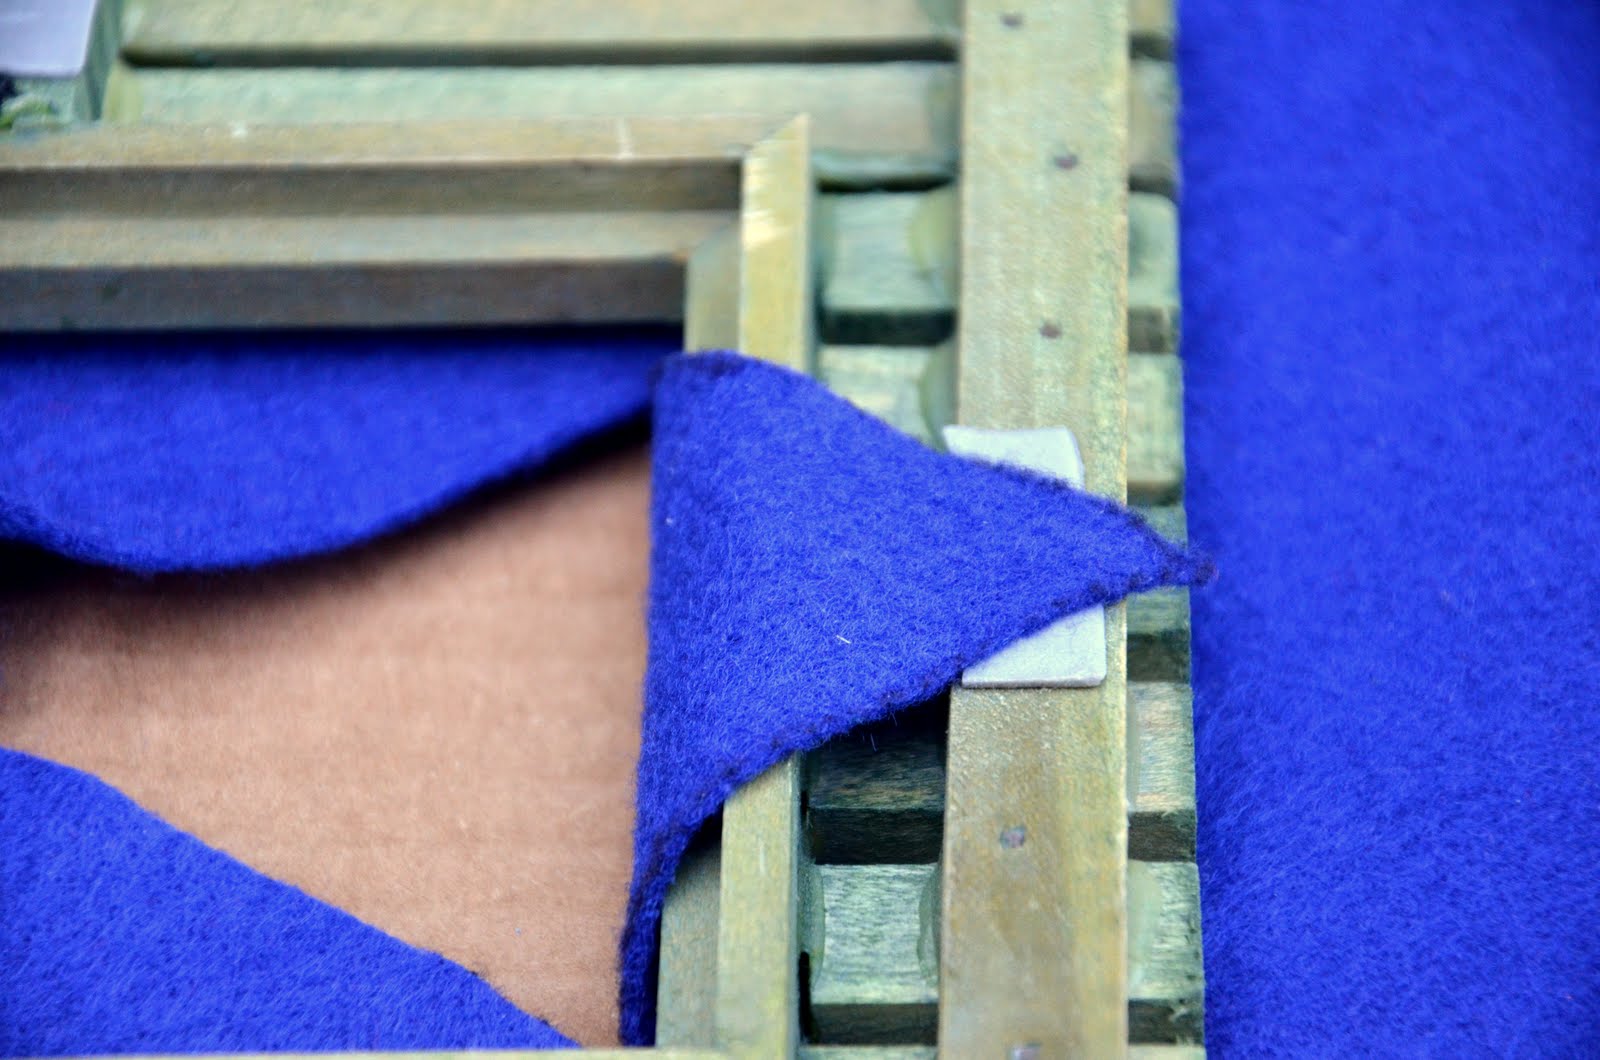
Step 3. - fold the X of felt, and secure it on the double sided tape.

After having wrapped yarn around the frame, you may find that the back does not fit in properly anymore. I just printed out the photo I chose to use on card stock, and cut it to fit. The card stock held up just fine, but there is no glass to protect it.
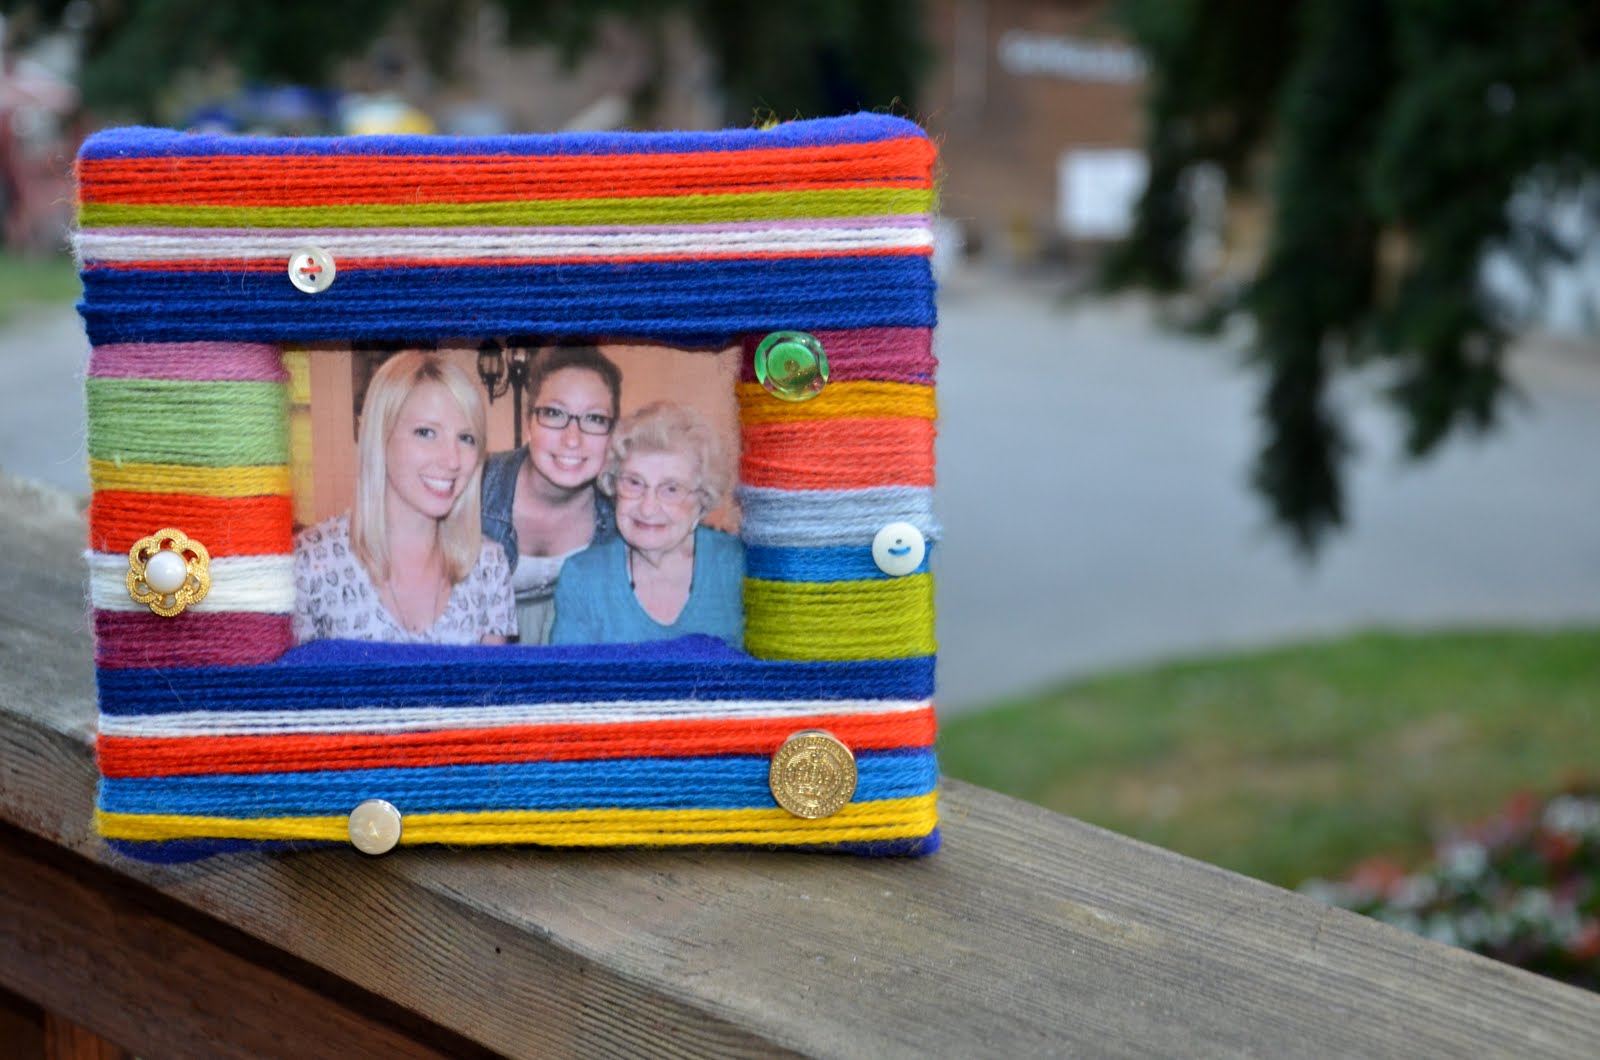
You may recognize this photo from one of our weekly wrap ups, it is Kelsey, our Auntie Tina and me, at our favourite thai restaurant.
This project was a bit more time consuming than I had anticipated, so give yourself lots of time! It was fun to experiment with the buttons and beads, which sometimes worked, and sometimes didn't. There are no rules when making a craft like this! Do you what you think looks good.
p.s. jordyn ♥
I love this recreation of a picture frame. It is so clever! And, the celebration of the special memory in the frame using colour, texture and buttons or jewellery is so personal and meaningful.
ReplyDeleteGotta like it!